Windows Mouse Click Animation(Lottie) #
What is it? #
Adding mouse click or touch motion in a Flutter app is no big deal. But what about apps running on Windows 10? If you can use Lottie animations, you could turn boring click motions into something that feels like a macOS app…
Windows has a long history, but since Vista, I haven’t really come across programs or open-source projects that deal with click animations. Sure, it’s mostly a trivial feature, but the built-in Windows functionality is just… terrible.

Still, I decided to give it a try.

Two Scenarios #
-
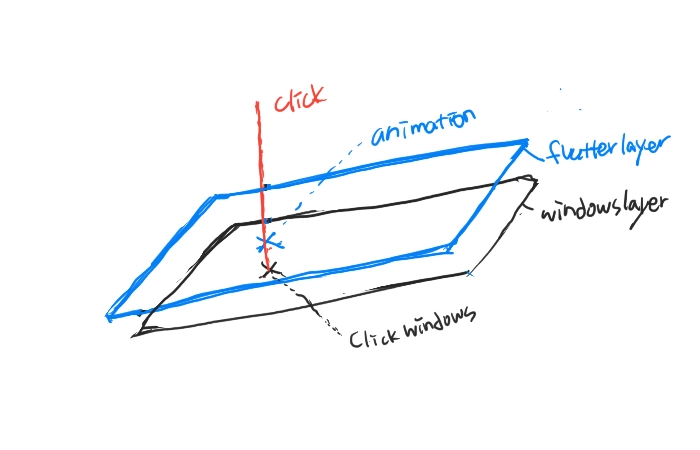
Send the click coordinates from Windows to Flutter
You run the Flutter app as an invisible layer, and when click coordinates are received, it plays an animation. -
Send the clicked coordinates from Flutter to Windows
Flutter plays the animation, and the coordinates sent to Windows trigger the actual click.
These are simple scenarios, but ChatGPT recommended #2. Following that advice led to a few days of trial and error. Eventually, I realized that #1 is the reliable approach.
Win32 and FFI #
On Flutter Android, whenever you try to do anything, you often need to touch native code—and it can easily break. Windows is no different: you have to deal with C++.
There are two ways to do this: write everything in Dart, or build a C++ DLL in Visual Studio and call it from Flutter.
Since I had no idea if it would even work, I did it for fun. Otherwise, I would have given up immediately.
Scenario Details #
- Flutter runs the DLL file.
- Windows, via the DLL, writes click coordinates to a text file whenever a click occurs.
- Flutter reads the coordinates from the text file and uses them to determine where to play the animation.
- The Flutter app runs fullscreen with a transparent background, in the background.
Packages Used #
For controlling the DLL, we just import io and ffi. For window management, we use window_manager. To play animations, we use the lottie package.
Calling the DLL #
The DLL must be executed from main(). I didn’t know why, but following ChatGPT’s instructions, it should be defined like this.
typedef StartHookThreadC = Void Function();
typedef StartHookThreadDart = void Function();
You run the startHookThread function. Its only function is to save click coordinates in C:\temp. Flutter only reads the coordinates saved in the text file.
final dylib = DynamicLibrary.open('click_hooking.dll');
final StartHookThreadDart startHookThread = dylib
      .lookupFunction<StartHookThreadC, StartHookThreadDart>('StartHookThread');

startHookThread();
Lottie Animation #
Rive provides incredible features, but Lottie just runs animations—and that’s perfect. You don’t need a full authoring tool like Rive to create animations; After Effects and Bodymovin can handle it.
By using a Stack with Positioned widgets, you can play click animations exactly where you want, ending this tedious setup.
First, here’s the C++ source code that needs to be built as a DLL using Visual Studio.
mouse_hook.cpp
#include <windows.h>
#include "pch.h"
#include <fstream>
#include <string>

HHOOK mouseHook;
std::string outputPath = "C:\\Temp\\click_position.txt";

LRESULT CALLBACK MouseProc(int nCode, WPARAM wParam, LPARAM lParam) {
    if (nCode >= 0 && wParam == WM_LBUTTONDOWN) {
        MSLLHOOKSTRUCT* mouseInfo = (MSLLHOOKSTRUCT*)lParam;
        int x = mouseInfo->pt.x;
        int y = mouseInfo->pt.y;

        std::ofstream out(outputPath);
        if (out.is_open()) {
            out << x << "," << y;
            out.close();
//            log("Click detected: " + std::to_string(x) + "," + std::to_string(y));
        }
    }
    return CallNextHookEx(mouseHook, nCode, wParam, lParam);
}

void SetClickHook() {
    // log("SetClickHook called");

    HMODULE hInstance = GetModuleHandle(NULL);
    mouseHook = SetWindowsHookEx(WH_MOUSE_LL, MouseProc, hInstance, 0);

    if (mouseHook == NULL) {
        //log("Failed to set mouse hook");
        MessageBoxW(NULL, L"Failed to set hook", L"Error", MB_ICONERROR);
        return;
    }
    //log("Mouse hook successfully set");

    MSG msg;
    while (GetMessage(&msg, NULL, 0, 0)) {
        TranslateMessage(&msg);
        DispatchMessage(&msg);
    }
   // log("Message loop exited");
}

extern "C" __declspec(dllexport) void RemoveClickHook() {
    if (mouseHook) {
        UnhookWindowsHookEx(mouseHook);
       // log("Mouse hook removed");
    }
}

DWORD WINAPI HookThreadProc(LPVOID) {
    SetClickHook();
    return 0;
}

extern "C" __declspec(dllexport) void StartHookThread() {
  //  log("Starting hook thread...");
    CreateThread(NULL, 0, HookThreadProc, NULL, 0, NULL);
}
On the Flutter side, there isn’t much to configure, but calling the DLL itself was a bit unfamiliar.
Also, even when using a dual-monitor setup, I limited the mouse click animation to appear only within the range from coordinate (0,0) up to 1920×1080.
For the Lottie animation specified in assets/click2.json, make sure to update the file name if necessary. Alternatively, you could add a feature to dynamically select different motions. Currently, the default animation duration is set to under 0.8 seconds. If you use a different animation length, you’ll need to adjust the duration code accordingly.
main.dart
import 'dart:async';
import 'dart:ffi';
import 'dart:io';

import 'package:flutter/material.dart';
import 'package:lottie/lottie.dart';
import 'package:window_manager/window_manager.dart';

//
//
// DLL 메서드 정의
typedef StartHookThreadC = Void Function();
typedef StartHookThreadDart = void Function();

//
//
// main
void main() async {
  WidgetsFlutterBinding.ensureInitialized();
  await windowManager.ensureInitialized();

  await windowManager.waitUntilReadyToShow(
    WindowOptions(
      skipTaskbar: false,
      alwaysOnTop: true,
      fullScreen: true,
      backgroundColor: Colors.transparent,
    ),
    () async {
      await windowManager.setIgnoreMouseEvents(true);
      await windowManager.setPosition(Offset.zero);

      await windowManager.show();

      debugPrint("✅ Window manager initialized");
    },
  );

  debugPrint("📦 Loading DLL...");
  final dylib = DynamicLibrary.open('click_hooking.dll');
  final StartHookThreadDart startHookThread = dylib
      .lookupFunction<StartHookThreadC, StartHookThreadDart>('StartHookThread');
  startHookThread();

  debugPrint("🔗 Setting mouse hook...");
  startHookThread();
  debugPrint("✅ Mouse hook thread started");

  runApp(const MyApp());
}

//
//
//MyApp
class MyApp extends StatelessWidget {
  const MyApp({super.key});

  @override
  Widget build(BuildContext context) {
    return MaterialApp(
      debugShowCheckedModeBanner: false,

      home: LayoutBuilder(
        builder: (context, constraints) {
          return SizedBox(
            width: constraints.maxWidth,
            height: constraints.maxHeight,
            child: ClickEffectOverlay(),
          );
        },
      ),
    );
  }
}

class ClickEffectOverlay extends StatefulWidget {
  const ClickEffectOverlay({super.key});
  @override
  State<ClickEffectOverlay> createState() => _ClickEffectOverlayState();
}

class _ClickEffectOverlayState extends State<ClickEffectOverlay> {
  final List<_ClickEffect> _effects = [];

  @override
  void initState() {
    super.initState();

    WidgetsBinding.instance.addPostFrameCallback((_) {
      final size = MediaQuery.of(context).size;
      debugPrint("📏 화면 크기: ${size.width} x ${size.height}");
    });

    _startListeningForMessages();
  }

  void _startListeningForMessages() {
    debugPrint("📡 Start listening for click coordinates...");
    Timer.periodic(const Duration(milliseconds: 100), (_) {
      _readClickPosition();
    });
  }

  void _readClickPosition() async {
    final file = File('C:/Temp/click_position.txt');
    if (await file.exists()) {
      final content = await file.readAsString();
      final parts = content.trim().split(',');
      if (parts.length == 2) {
        final xRaw = double.tryParse(parts[0]);
        final yRaw = double.tryParse(parts[1]);

        if (xRaw != null && yRaw != null && xRaw != 0 && yRaw != 0) {
          // MediaQuery로 DPI 값 얻기
          final dpiScale = MediaQuery.of(context).devicePixelRatio;

          // 클릭 위치를 DPI 스케일에 맞게 변환
          final x = xRaw / dpiScale;
          final y = yRaw / dpiScale;

          debugPrint('📍 Scaled click: x = $x, y = $y');

          _showClickEffect(Offset(x, y));
          await file.writeAsString('0,0'); // 중복 방지
        }
      }
    }
  }

  void _showClickEffect(Offset offset) {
    // 화면 크기 내에서만 애니메이션을 표시하도록 조건 추가
    if (offset.dx < 0 || offset.dy < 0 || offset.dx > 1920 || offset.dy > 1080)
      return;

    setState(() {
      _effects.add(_ClickEffect(offset));
    });

    Timer(const Duration(milliseconds: 800), () {
      if (_effects.isNotEmpty) {
        setState(() {
          _effects.removeAt(0);
        });
      }
    });
  }

  @override
  Widget build(BuildContext context) {
    final size = MediaQuery.of(context).size;
    final ratio = MediaQuery.of(context).devicePixelRatio;

    debugPrint("📐 화면 크기: ${size.width} x ${size.height}, DPI: $ratio");

    return Container(
      color: Color.fromRGBO(1, 1, 1, 0.01),
      child: Stack(
        children: [
          ..._effects
              .where(
                (e) =>
                    e.offset.dx >= 0 &&
                    e.offset.dx <= 1920 &&
                    e.offset.dy >= 0 &&
                    e.offset.dy <= 1080,
              )
              .map((e) {
                return Positioned(
                  left: e.offset.dx - 50,
                  top: e.offset.dy - 50,
                  child: SizedBox(
                    width: 100,
                    height: 100,
                    child: Lottie.asset('assets/click2.json'),
                  ),
                );
              })
              .toList(),
        ],
      ),
    );
  }
}

class _ClickEffect {
  final Offset offset;
  _ClickEffect(this.offset);
}
Result #
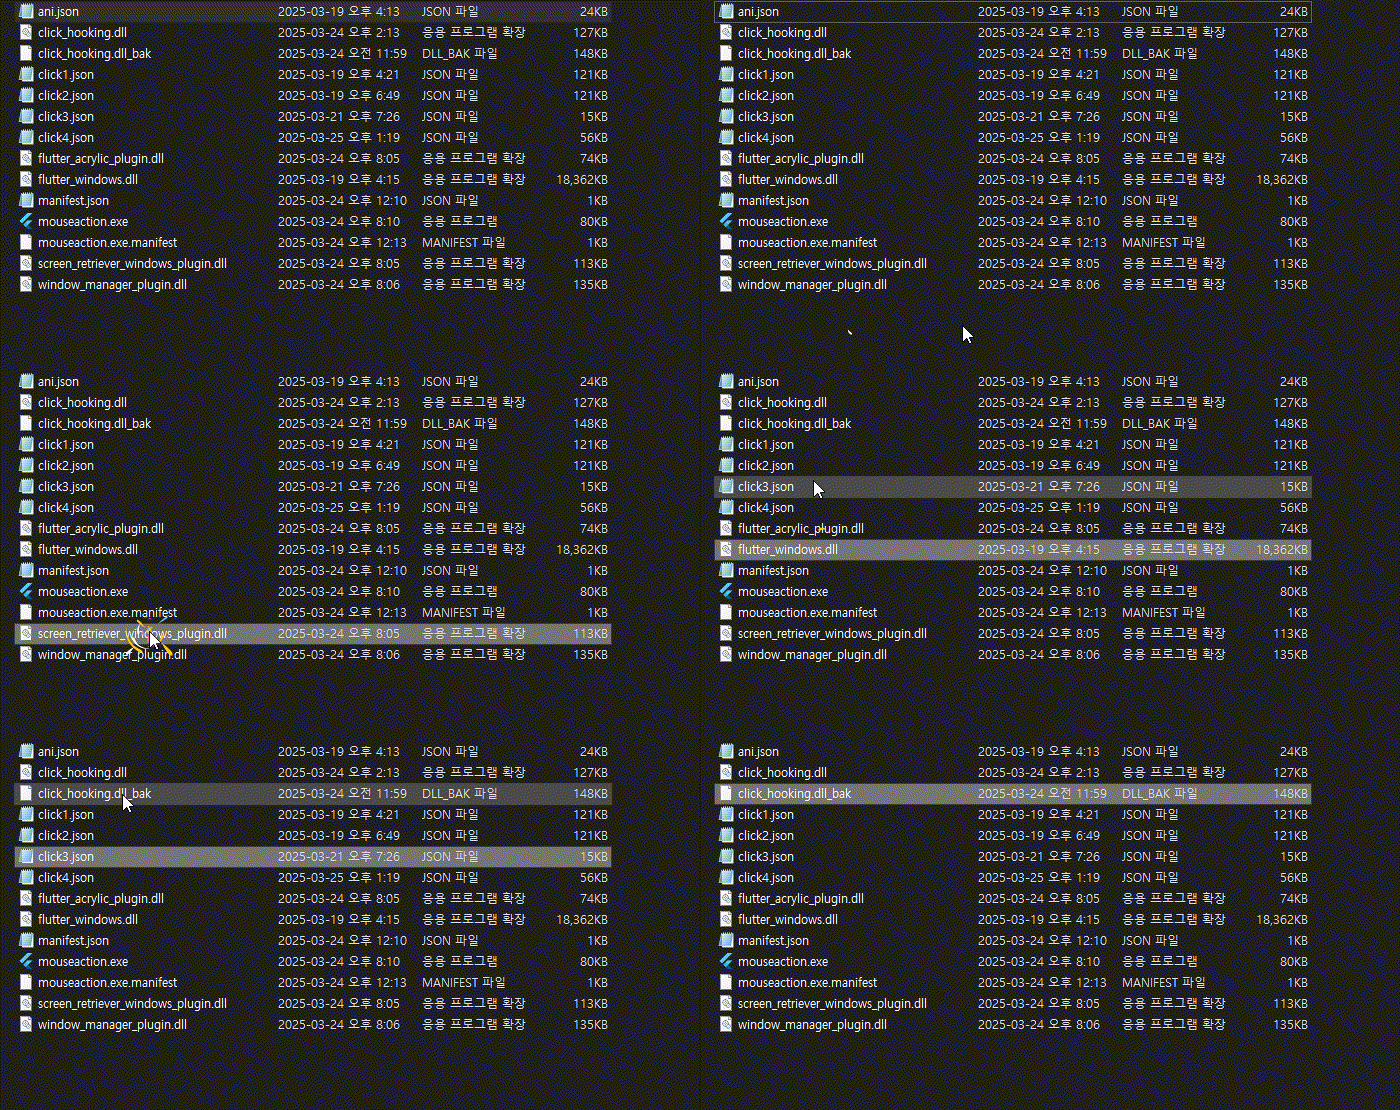
For click motions, a simple one-time animation is enough. You don’t need Rive animations, and LottieFiles provides animations you can download and use easily without much effort.
The GIF below shows the result with a Lottie animation. The quality isn’t bad at all—though the GIF format makes it look slightly choppy.

Should I add a separate button to change the animation?
Should right-clicks have a separate animation?
No. That was just my thought process—so let’s leave it cleanly here.
The End.