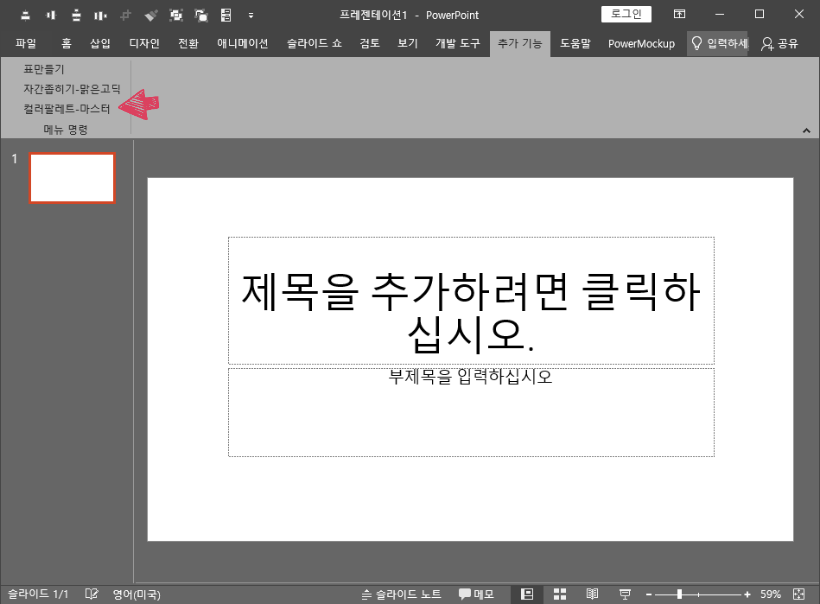
ppt - 자주 쓰는 색 컬러팔레트
파워포인트의 색
색을 고르는 일은 몹시 어려운 일이다. 이색 저색 써보는 것도 방법이지만, 실상 회사에서 사용하는 색은 주로 CI색을 사용하기 때문에, 몇가지 자주쓰는 색을 박아놓고 쓰는 것도 나쁘지 않다.
슬라이드 마스터 팔레트
파워포인트에 피커기능이 생긴 이후로, 마스터에 박스로 팔레트를 만들어 놓고 쓰는 사람이 꽤 보인다. 그럼 처음 켰을 때, 마스터에 내가 자주쓰는 색 팔레트를 만들어 놓는 버튼을 해두면 어떨까?
생각보다… 귀찮다.
아쉽게도 파워포인트 VBA는 엑셀만큼 나이스 하지 않으므로, 최소한의 기능으로 생각을 한다.
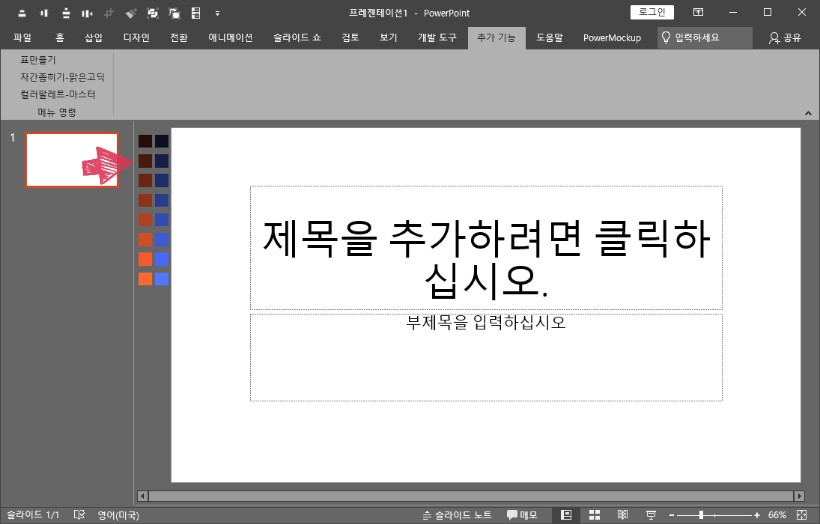
새문서를 켜고, 버튼을 누르면, 8개 작은 박스에 주황/파랑 그라데이션이 들어간 팔레트를 만들어준다.
만들기 전에는 많은 걸 생각했지만, 코딩실력의 한계는 자동으로 기능의 간소화로 이어진다.
colorIndex를 지원하지 않으..(맞나?)므로, 필요한 컬러에서 RGB를 강제로 조정하는 꼼수를 쓴다… 나름 애썼다.
Sub pal()

Dim mySlideMaster As Master
Dim left As Integer
Dim top As Integer
Dim size As Integer
Dim colarrRed(8) As Integer
Dim colarrGreen(8) As Integer
Dim colarrBlue(8) As Integer

Set mySlideMaster = Application.ActivePresentation.SlideMaster

size = 20
    For c = 1 To 8
        'blue color
        colarrRed(c) = -10
        colarrGreen(c) = 51
        colarrBlue(c) = 72

        top = 30 * (c - 1) + 10
        left = -25

        colarrRed(c) = colarrRed(c) + (10 * c)
        colarrGreen(c) = colarrGreen(c) + (15 * c)
        colarrBlue(c) = colarrBlue(c) + (35 * c)

        With mySlideMaster.Shapes.AddShape(Type:=msoShapeRectangle, left:=left, top:=top, Width:=size, Height:=size)

            .Fill.ForeColor.RGB = RGB(colarrRed(c), colarrGreen(c), colarrBlue(c))
            .Line.Visible = msoFalse

        End With

        'red color
        colarrRed(c) = -9
        colarrGreen(c) = 26
        colarrBlue(c) = -6
        left = -50
        colarrRed(c) = colarrRed(c) + (35 * c)
        colarrGreen(c) = colarrGreen(c) + (13 * c)
        colarrBlue(c) = colarrBlue(c) + (6 * c)

        With mySlideMaster.Shapes.AddShape(Type:=msoShapeRectangle, left:=left, top:=top, Width:=size, Height:=size)
            .Fill.ForeColor.RGB = RGB(colarrRed(c), colarrGreen(c), colarrBlue(c))
            .Line.Visible = msoFalse
        End With

    Next c

End Sub
자주 쓰는 색 컬러팔레트 두번째
일전에, 자주 쓰는 색을 슬라이드 마스터에 자동 등록하는 매크로를 만드는 글을 작성한 적이 있다. 애초 설계를 했을 때, 내가 사용하는 색이 두가지 뿐이었으므로, 두가지 색만 강제로 생기도록 설계를 했었는데, 사용상 아쉬움이 많다.
①번 선택창
기본 색상을 적용할지 YES/NO 선택창
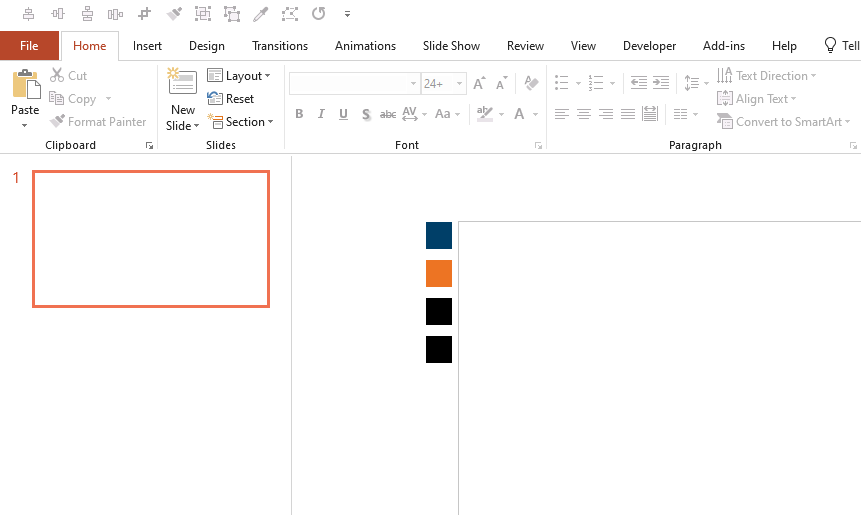
- Yes : CI 색상 2개 컬러와 회색 컬러 2개 박스가 생기고, 종료.
- No : ②번 선택창으로 이동
②번 선택창
원하는 컬러를 입력하는 방식을 선택 - HEX color 형태를 입력할지 여부를 선택
- Yes : ③번 입력창(HEX color)으로 이동
- No : ④번 입력창(RGB color)으로 이동
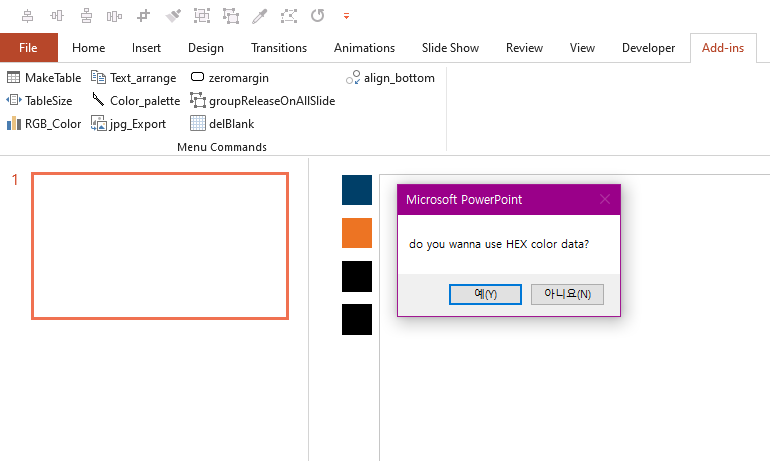
③번 입력창(HEX color)
HEX color code 값을 입력해준다. #000000 형태로, #은 넣어도 되고, 빼도 된다.
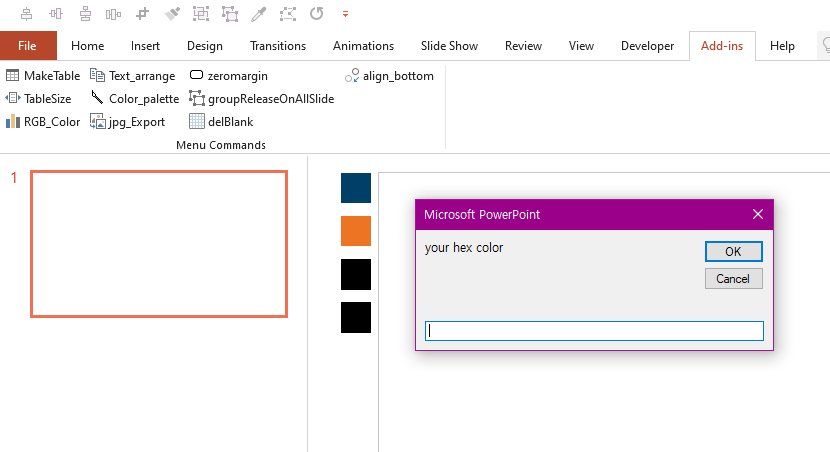
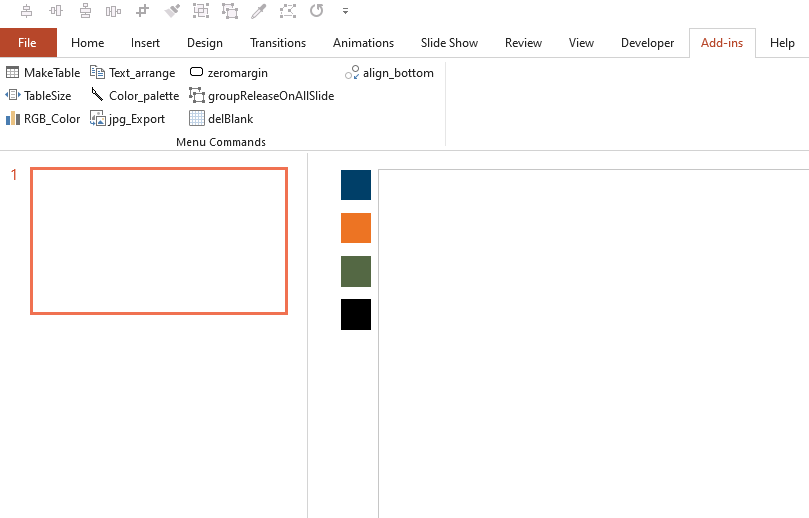
좌측 정렬된 박스 중 몇번째에 넣을지 인덱스 값을 넣어준다. 위에서부터 1번이며, 없는 인덱스 값일 경우, 신규로 생성을 한다. 단, 기존에 있는 인덱스 번호이면, 위에 올려진다.
아래는 3번 인덱스 값에 녹색을 넣은 결과이다. HEX code가 뭐였는지는 기억이 나질 않는다.
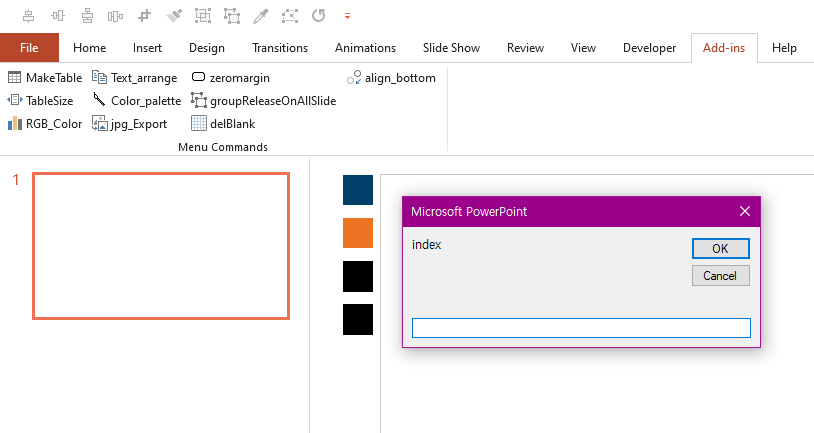
④번 입력창(HEX color)
한 개의 창에서 입력하는 형태로 할까 했는데, 그렇게 되면 파워포인트 기본 컬러 세팅하는 창과 별 차이가 없어서, R, G, B 값을 순차적으로 넣게 했다. 입력된 값이 0보다 작으면 0이, 255보다 크면 255가 입력된다. 내가 설계한게 아니라, 파워포인트에서 자동으로 그렇게 하더라.
HEX code 때와 마찬가지로, 인덱스 값을 입력해준다.
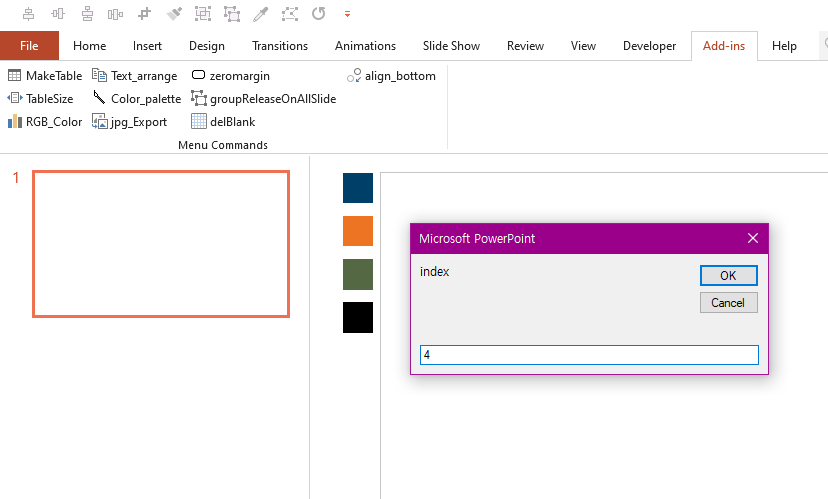
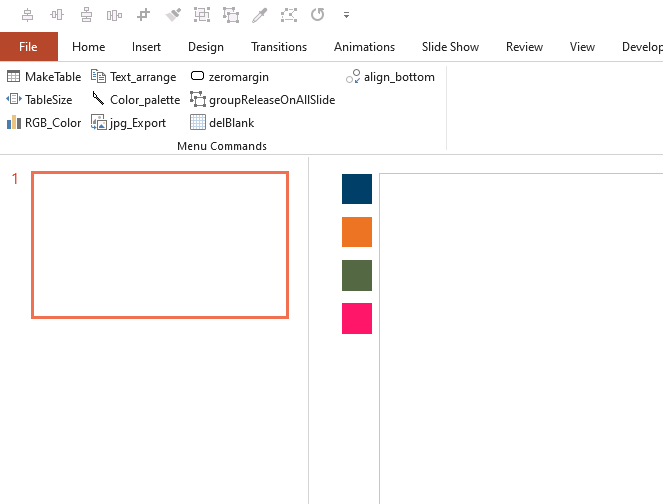
4번 인덱스에 덮어쓰면 아래 그림처럼 된다. 슬라이드 마스터에 들어가서 위에 박스를 지우거나 치우면, 아래 박스는 그대로 살아있다.
코드는 아래와 같다.
Sub pal2()
'컬러팔레트
Dim mySlideMaster As Master
Dim left As Integer
Dim top As Integer
Dim size As Integer
Dim idx As Integer
Dim rgb1 As Long
Dim rgb2 As Long
Dim hexcolor As String
Set mySlideMaster = Application.ActivePresentation.SlideMaster
If MsgBox("do you wanna set default?", vbYesNo) = vbNo Then
If MsgBox("do you wanna use HEX color data?", vbYesNo) = vbYes Then
On Error GoTo Err_Check
hexcolor = InputBox("your hex color")
newcol = HexToRGB(hexcolor)
colred = Replace(Split(newcol, ",")(0), " ", "")
colgreen = Replace(Split(newcol, ",")(1), " ", "")
colblue = Replace(Split(newcol, ",")(2), " ", "")
idx = InputBox("index")
Else
On Error GoTo Err_Check
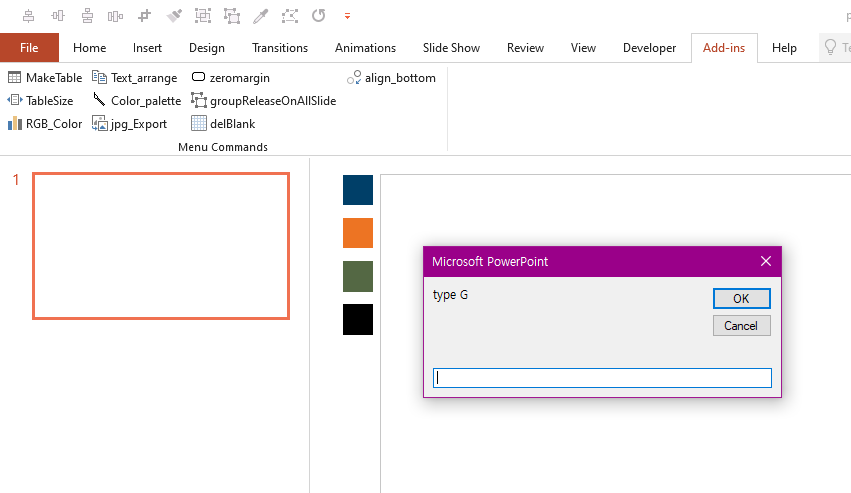
colred = InputBox("type R")
colgreen = InputBox("type G")
colblue = InputBox("type B")
idx = InputBox("index")
If colred < 0 Or colgreen < 0 Or colblue < 0 Or idx <= 0 Then
GoTo Err_Check
End If
End If
top = 0
left = -25
size = 20
With mySlideMaster.Shapes.AddShape(Type:=msoShapeRectangle, left:=left, top:=topcal(idx, size), Width:=size, Height:=size)
.Fill.ForeColor.RGB = RGB(colred, colgreen, colblue)
.Line.Visible = msoFalse
End With
Else
rgb1 = RGB(0, 63, 104)
rgb2 = RGB(237, 116, 35)
For x = 1 To 4
counter = counter + 1
With mySlideMaster.Shapes.AddShape(Type:=msoShapeRectangle, left:=-25, top:=((x - 1) * 20) + (ConvertCmToPoint(0.3) * (x - 1)), Width:=20, Height:=20)
If x = 1 Then
.Fill.ForeColor.RGB = rgb1
ElseIf x = 2 Then
.Fill.ForeColor.RGB = rgb2
Else: .Fill.ForeColor.RGB = RGB(0, 0, 0)
End If
.Line.Visible = msoFalse
End With
Next x
End If
Err_Check:
If Err.Number <> 0 Then
MsgBox "오류번호 : " & Err.Number & vbCr & _
"오류내용 : " & Err.Description, vbCritical, "오류"
End If
Exit Sub
Err_Check2:
MsgBox "you have wrong input value"
Exit Sub
End Sub
Function topcal(idx As Integer, size As Integer)
If idx = 1 Then
topcal = 0
Else
topcal = ((idx - 1) * size) + (ConvertCmToPoint(0.3) * (idx - 1))
End If
End Function
Function ConvertPointToCm(ByVal pnt As Double) As Double
ConvertPointToCm = pnt * 0.03527778
End Function
Function ConvertCmToPoint(ByVal cm As Double) As Double
ConvertCmToPoint = cm * 28.34646
End Function
Function HexToRGB(hexcolor As String)
Dim R As Integer
Dim G As Integer
Dim B As Integer
On Error GoTo Err_Check
hexcolor = Replace(hexcolor, "#", "")
hexcolor = Right$("000000" & hexcolor, 6)
R = val("&H" & Mid(hexcolor, 1, 2))
G = val("&H" & Mid(hexcolor, 3, 2))
B = val("&H" & Mid(hexcolor, 5, 2))
newrgbcolor = R & ", " & G & ", " & B
Debug.Print newrgbcolor
HexToRGB = newrgbcolor
Err_Check:
If Err.Number <> 0 Then
MsgBox "오류번호 : " & Err.Number & vbCr & _
"오류내용 : " & Err.Description, vbCritical, "오류"
End If
Exit Function
End Function
끝.