flutter - Rust를 c++ 대신 사용하기
C++ ↔ Rust
간단한 예제를 만들어서 C++ 대신 Rust로 만든 DLL을 Flutter에서 사용해본다.
윈도우즈에서 마우스 좌표를 얻어오는 간단한 예제이다.
Rust 프로젝트 생성
프로젝트를 library 타입으로 생성한다.
cargo new mousepos --lib // --bin (cargo run)
cd mousepos
// cargo build --release
마우스 좌표를 얻어오는 코드 구성
Cargo.toml
[package]
name = "mousepos"
version = "0.1.0"
edition = "2021"

[lib]
crate-type = ["cdylib"]

[dependencies]
windows = { version = "0.62.2", features = ["Win32_UI_WindowsAndMessaging"] }
lib.rs
use windows::Win32::Foundation::POINT;
use windows::Win32::UI::WindowsAndMessaging::GetCursorPos;

#[repr(C)]
pub struct Point {
    pub x: i32,
    pub y: i32,
}

/// 반환값: 1 = 성공, 0 = 실패
#[no_mangle]
pub extern "C" fn get_cursor_pos(out: *mut Point) -> u8 {
    if out.is_null() {
        return 0;
    }
    unsafe {
        let mut p = POINT { x: 0, y: 0 };

        // windows 0.5x: GetCursorPos -> Result<(), Error>
        if GetCursorPos(&mut p as *mut POINT).is_ok() {
            (*out).x = p.x;
            (*out).y = p.y;
            1
        } else {
            0
        }
    }
}
DLL 파일을 빌드한다. 파일을 복사해 둔다.
Flutter 구성
DLL 파일을 불러온다.
mousepos_ffi.dart
import 'dart:ffi';
import 'package:ffi/ffi.dart' as ffi;

base class Point extends Struct {
  @Int32()
  external int x;

  @Int32()
  external int y;
}

typedef _GetCursorPosNative = Uint8 Function(Pointer<Point>);
typedef _GetCursorPosDart = int Function(Pointer<Point>);

class MousePos {
  final DynamicLibrary _lib;
  late final _GetCursorPosDart _getCursorPos;

  MousePos._(this._lib) {
    _getCursorPos = _lib
        .lookupFunction<_GetCursorPosNative, _GetCursorPosDart>('get_cursor_pos');
  }

  static MousePos load({String? path}) {
    // Windows에서는 DLL 파일명만 주어도 PATH 내에서 검색
    final lib = DynamicLibrary.open(path ?? 'mousepos.dll');
    return MousePos._(lib);
  }

  /// (x, y) 반환. 실패 시 null.
  ({int x, int y})? getCursorPos() {
    final out = ffi.calloc<Point>();
    try {
      final ok = _getCursorPos(out);
      if (ok == 1) {
        return (x: out.ref.x, y: out.ref.y);
      }
      return null;
    } finally {
      ffi.calloc.free(out);
    }
  }
}
UI 파트를 구성한다.
main.dart
import 'dart:async';
import 'package:flutter/material.dart';
import 'mousepos_ffi.dart';

void main() {
  runApp(const MyApp());
}

class MyApp extends StatelessWidget {
  const MyApp({super.key});

  @override
  Widget build(BuildContext context) {
    return const MaterialApp(
      debugShowCheckedModeBanner: false,
      home: MousePosPage(),
    );
  }
}

class MousePosPage extends StatefulWidget {
  const MousePosPage({super.key});

  @override
  State<MousePosPage> createState() => _MousePosPageState();
}

class _MousePosPageState extends State<MousePosPage> {
  late final MousePos _mousePos;
  Timer? _timer;
  String _text = '좌표를 읽는 중...';

  @override
  void initState() {
    super.initState();
    _mousePos = MousePos.load(); // mousepos.dll을 실행 파일 옆에 둠
    _timer = Timer.periodic(const Duration(milliseconds: 33), (_) {
      final p = _mousePos.getCursorPos();
      if (!mounted) return;
      setState(() {
        _text = p == null ? '읽기 실패' : 'X: ${p.x} , Y: ${p.y}';
      });
    });
  }

  @override
  void dispose() {
    _timer?.cancel();
    super.dispose();
  }

  @override
  Widget build(BuildContext context) {
    return Scaffold(
      appBar: AppBar(
        title: const Text('마우스 좌표 표시 (Rust + Flutter)'),
        backgroundColor: Colors.grey,
      ),
      body: Center(child: Text(_text, style: const TextStyle(fontSize: 28))),
    );
  }
}
DLL 파일 저장 위치
build/windows/x64/runner/Debug
build/windows/x64/runner/Release
위 폴더에 mousepos.dll을 복사하면 exe 실행 시 정상적으로 로딩된다.
DLL 파일이 없으면 exe 실행 시 로딩 오류가 발생한다.
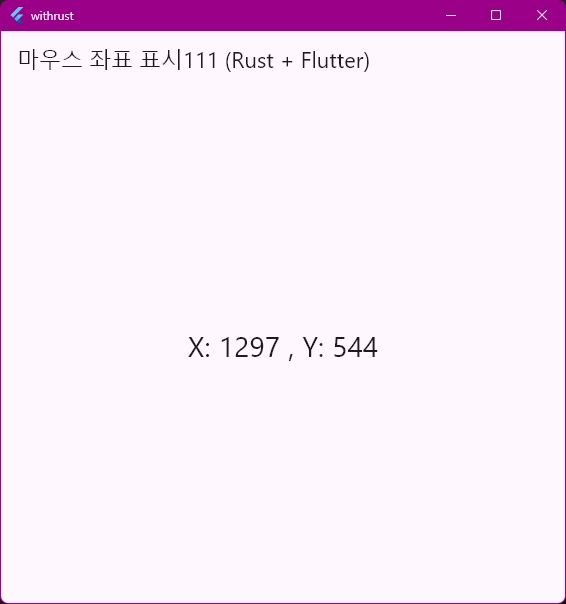
결과물
C++로 직접 작성하는 것보다 Visual Studio 설정에 덜 의존적이고, Rust 쪽 코드가 훨씬 간결해서 개인적으로는 사용하기 좋았다. 어디까지 활용할 수 있을지 모르겠다..(rust나 c++이나 어려운건 매한가지다.)
끝.